Platypus Next Peril - Tiles
It's peril time!
So what's been going on in the world of the platypuses, or should that be platypi? or even platypodes!........... Who knows!!........but.......
In this episode I will talk about my pixel work with tiles, using the Tiled editor to create a level map; oh and stay tuned right to the end, for some tips on exporting a Tiled map to the Next format.
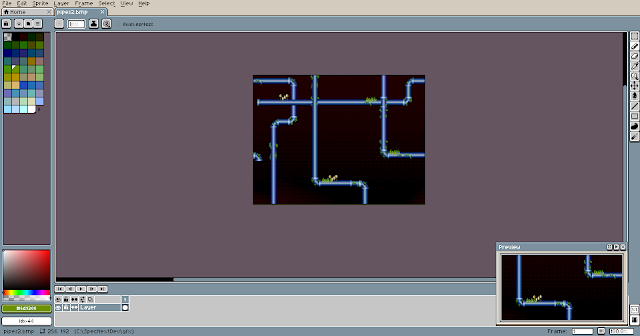
Again as in the last post, I used Aseprite. Here I started with a full screen size image of some sewer pipes. Thinking ahead and in readiness for testing, I made this so it could be scrolled endlessly, with a parallax effect in mind. So this would be a background to the main game map.
Same image but showing how it would tile.
Just bear in mind that I might change some tiles or levels as I develop the game.
My tiles are based on a 16x16 pixel design, so while I was in Remy's tool, I tried playing around with the map feature.
This tool is quite powerful, but I wanted a way to create the levels and be able to go back in and edit, changing the design more easily. In the past I have used Tiled for some of my other projects on the PC, so thought this would be good to use. It is a powerful bit of kit and very flexible, I also knew it had an option to create scripts for export plugins, which would be good if I could get this working.
You can easily Google Tiled, or get to it from the link here:
First I loaded in the tile PNG image containing all my sprites, which I had arranged in the same format as Remy's tool, so that when I imported it into Tiled, the number references would be the same. (You can see these as blocks on the right of the image.)
Then I recreated the test level I had made in Remy's tool and was all ready to try and export.
/* NextMap256.js** A Tiled plugin to export a tile map as a binary file with hex values.* Blank tiles with a value of -1 are replaced with 00.* Supports tile ID up to 256 (64 tiles for 16x16 pixels and 256 for 8x8 pixels)** By Paul Spectre Harthen**/var customZXNextBinaryExport256 = {name: "ZXNext Map 256 tile mode",extension: "map",write: function(p_map, p_fileName) {var outputFile = new BinaryFile(p_fileName, BinaryFile.WriteOnly);var bytes = [];for (let i = 0; i < p_map.layerCount; ++i) {let currentLayer = p_map.layerAt(i);if (currentLayer.isTileLayer) {for (let y = 0; y < currentLayer.height; ++y) {for (let x = 0; x < currentLayer.width; ++x) {let currentTile = currentLayer.cellAt(x, y);let currentTileID = currentTile.tileId;let byteValue = currentTileID === -1 ? 0x00 : currentTileID & 0xFF;bytes.push(byteValue);}}}}let byteArray = new Uint8Array(bytes);outputFile.write(byteArray.buffer);outputFile.commit();}};tiled.registerMapFormat("zxnextBinaryExport256", customZXNextBinaryExport256);
Once created you need to save it in the Tiled export plugins folder. This can be found by selecting preferences, plugins and opening the folder location.
When saved you should just be able to select Export from the file option, (You may have to restart Tiled, although I found I didn't need to.) and from the file type dropdown select ZX Next Map. Call the file a name with the .map extension, eg level1.map, and that's it.
You will now have a .map file with all your level data, with the size of your selected level using 2 digit Hex values, in a binary file format. This would be a maximum of 256 tiles that can be used with 16x16 pixel tiles at 64 and 8x8 pixel at 256.
This can then be loaded in something like NextBuild or ZX Studio for use with Boriel Basic.
So there you have it, hope you have enjoyed this new post and as always............. Have fun 👾


so prospectively scrolling is in the plan, even parallax .. ad tiles .. when I look at static images from games, I count tiles along the x/y axis to see in what resolution /x8, x16 pixels/ they are running.
ReplyDelete